Monday, December 31, 2012
Sunday, December 16, 2012
SNOWFLAKES by Nina
I love this cutter - the prettiest I've seen. Where did it come from?
Nina says: This is one of my favorite cookie cutters! Auntie Janet gave it to me for my birthday in the spring and I've been looking forward to using it this winter. I don't know where she got it. Maybe she remembers and will post in the comments!
They say there are no two snowflakes alike - hard to believe!
These are soooo pretty, Nina!
Nina says: Thank you, Momsu! They were fun to make. I only made these three but would like to do lots more.
- posted by Momsu
Wednesday, December 12, 2012
SAN DIEGO SNOWFLAKES
No snow in San Diego - just in the mountains to the east of the city once in awhile. But we can MAKE snowflakes! So - from the archives since I'm not decorating cookies until this coming weekend and it's time to get something wintry on the blog:
I like the look of piping in white accented with sanding sugar on a ginger cookie.
Even prettier is white on white. A six-sided star makes a nice snowflake if you don't have or (in my case) don't want to use a snowflake cutter.
And cut out around the edges of big cookies are small bite-sized snowflakes. Be sure to bake cookies of the same size together so the little ones don't get too done while the bigger ones are taking longer.
A six-sided scalloped cutter makes a pretty snowflake too.
Or decorate fat stars in the same way - this one is sprinkled with granulated sugar which stuck to the ginger cookie as well as the icing giving a frosty effect.
- posted by Momsu
Saturday, December 1, 2012
FALL COLOR GIVES WAY TO BARE TREES
I discovered photographing my cookies in the sun works well but not on a day when the sun keeps going behind a cloud - like the day I photographed these cookies. It took me forever!
Here's an example of what happens:
This cookie was photographed in the sun - the color is good but with the November sun low in the sky every imperfection shows up. My icing was too thick and it looks like the struggle it was! It will take some Photoshop work to make it look presentable. But if it's a good icing job the sun works very nicely.
Here's the same cookie taken when the sun went behind a cloud. The icing looks better but the color is dull and it will take some Photoshop work to get the color to look better - but not good. The cookies at the top of this post were taken when the sun went behind a cloud and they look dull in spite of Photoshop.
So - I need to slow down and not be in such a hurry - and make sure my royal icing is the right consistency. See Sugarbelle's 20-second icing tutorial. And perhaps I need to set up a photo light box inside instead of using nature's light box? See Sugarbelle's post on photographing cookies.
- posted by Momsu
Saturday, November 24, 2012
FALL TREES
When I saw Nina's fall leaves I was inspired to make trees. I got the icing too thick and had trouble flooding - more than one cookie was scraped off and iced again. The yellow icing was thinner and the orange dots sunk right in - I like the look of more three-dimensional dots on the other two trees better.
I have a lot of cookie cutters but I don't have a tree - except of course for a Christmas tree and I have several of those.
Inspired by Sugarbelle (this link is to just one of her posts on combining cutters) I put a few cookie cutters together - a flower and for the trunk a snowman's hat up-side-down.
This tree is an up-side-down Christmas ornament. I never did make a cookie ornament that I liked - but for a tree it's perfect.
And this tree is a heart with the point rounded and the snowman's hat again - both up-side-down.
I had icing left over from some "bare" trees (next post) and tried a brown tree. It was disturbing since it LOOKED like chocolate but didn't TASTE like chocolate - even more disturbing when I ate it! Brown or chocolate icing on a sugar cookie would work but chocolate icing on a ginger cookie doesn't sound good to me!
- posted by Momsu
Monday, November 19, 2012
AN ORANGE TREE
I was making cookies in the shape of fall trees by adding a "trunk" to a flower cookie and in the process made an orange tree.
- posted by Momsu
Tuesday, November 6, 2012
AUTUMN LEAVES by Nina
A couple of years ago I told Momsu that I'd like some leaf cookie cutters. In our family we take gift hints very seriously! Sure enough, I was soon in possession of these three great leaf shapes.
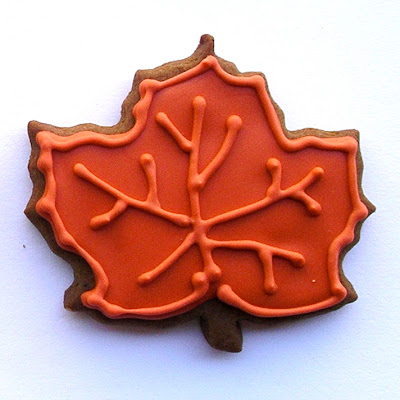
Maple
Oak
I wasn't sure if I liked this shape until I made it into a cookie and I do! It just goes to show you that if you're on the fence about a cookie cutter, try it out and you may love it.
Sycamore
I love the irregular edge on this one.
I recently bought this one for myself at a local cake/cookie decorating shop.
These little ones are from a set I've had for a long time. I use them at Thanksgiving to make "crusties" out of leftover pie dough sprinkled with sugar to serve with the pie. They make great little ginger cookies!
They make a nice pattern, too. (Inspiration for surface pattern design is everywhere!)
I'm really happy with the colors, and I had fun with the piping, too.
-Nina
Tuesday, October 30, 2012
PUMPKIN PATCH AND BATS
Jill makes small, thin, pop-in-your-mouth sugar cookies flavored with a combination of vanilla and almond extract and sprinkled with sugar that DaddyO loves. It's her specialty. She surprised her Daddy last week with a box of Halloween shapes in the mail. Good job, Jill! -Momsu
SUGAR COOKIES
Printable Recipe
(This is from a group of cookie recipes published in Woman’s Day magazine in 1964 – still our favorite plain sugar cookie.)
2 3/4 cups sifted all-purpose flour
1 teaspoon baking powder
1/2 teaspoon salt
3/4 cup soft (not runny) butter
1 cup granulated white sugar
2 eggs
Printable Recipe
(This is from a group of cookie recipes published in Woman’s Day magazine in 1964 – still our favorite plain sugar cookie.)
2 3/4 cups sifted all-purpose flour
1 teaspoon baking powder
1/2 teaspoon salt
3/4 cup soft (not runny) butter
1 cup granulated white sugar
2 eggs
1 teaspoon vanilla extract (or a combination of vanilla and almond extracts)
Sift the flour, baking powder and salt together in a bowl and reserve. Put the butter in the large bowl of the electric mixer (or other bowl if mixer is not available). Beat with mixer or wooden spoon until the mixture is light and fluffy. Stir in the flour mixture with the mixer or spoon, blending until smooth.
Chill 1 hour or until firm.
Roll a small amount of dough at a time on floured board to 1/8” thickness. Keep remaining dough in refrigerator until ready to use. Cut into desired shapes with floured cookie cutter. Put on ungreased cookie sheets. Sprinkle with granulated sugar. Bake in moderate oven (375°) 8 to 10 minutes or until pale brown. Remove to wire racks to cool.
Makes about 4 dozen 3” cookies. Store cookies airtight. These cookies keep well but are not good shippers as they break easily.
I always double this recipe:
5 1/2 cups sifted all-purpose flour
2 teaspoon baking powder
1 teaspoon salt
1 1/2 cups soft (not runny) butter
2 cups granulated white sugar
4 eggs
2 teaspoons vanilla extract (or a combination of vanilla and almond extracts)
Thursday, October 25, 2012
JACK IN A HAT
This year I became obsessed with finding a witch's hat to put on a pumpkin - cookie cutters that is. I searched locally and found one in a set - but I didn't want the cauldron, the boot or the broom. Online I found just the hat I wanted - several places of course, and then it became a matter of how much shipping did I want to pay for just one cookie cutter? I needed other things too but no one site seemed to have all of the things I wanted to amortize the cost of the shipping. Well actually one site came close but they charged by weight and I seemed to have heavy wants - it adds up fast!
Finally I decided this was stupid and ordered my witch's hat from Off the Beaten Path through Amazon for $1.25 plus $3.78 shipping. They are one of the sites that charges by weight - not so bad if you only want cookie cutters. The hat was here in two days - WOW!
Saturday, October 20, 2012
PUMPKIN AND A CAT
I've had this cat cookie cutter for a long time but had never made a black cat cookie - because I didn't know about Americolor! Black Americolor has no taste and it isn't messy. The pumpkin is from my Nut Tree collection of cutters and is big - 5x5 inches. The pumpkin cookie is from my archives and through the magic of Photoshop apears with the cat. -Momsu
Saturday, October 13, 2012
CANDY CORN & GHOSTS by Nina
I love candy corn! I thought a sugar cookie with a glaze would be perfect, giving the cookies that slightly waxy appearance. And it turns out the imperfections in my glazing technique look similar to the texture on the real thing!
These are 2" high. I cut a 2" thick strip of dough, then used the end of an ice cream cone cutter to cut the triangles.
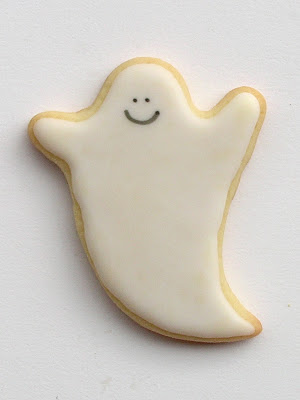
This little ghost is part of a set of 3 sizes of ghosts. I love the simple shape and thought he could share the white glaze from the candy corn.
What do you call a group of ghosts? I read on another blog someone calling it a "haunt" which is cute!
I reclaimed my small letters from the play dough toys. When ghosts and candy corn share a cookie platter, this is what happens, candy corn colored BOOs!
A happy plate of yummy treats.
See more over at Nina's Show & Tell.
Happy Halloween!
-Nina
Friday, October 5, 2012
HALLOWEEN BEARS & PUMPKINS by Nina
Halloween Baking has begun!
Bear is dressed for the occasion.
He's been to the pumpkin patch!
It was fun to pipe the vines onto these pumpkins.
I have lots of ideas for more Halloween cookies, it's still early in October so I hope to have more to show soon! See more over at Nina's Show & Tell. -Nina
MOMSU SAYS: I remember the first time you made that cute ginger bear with the pudgy nose - one Christmas a long time ago! It's fun to see him again in his pumpkin T-shirt.
I like the color on your pumpkins - is it Americolor orange or did you mix it? I need to replace my odds and ends of colors and invest in Americolor - it's the best!
NINA SAYS: I used Americolor orange and I may have added some egg yolk yellow. You'd think I'd remember since it was just last week! I'd better start taking better notes. It's great to work with!
NINA SAYS: I used Americolor orange and I may have added some egg yolk yellow. You'd think I'd remember since it was just last week! I'd better start taking better notes. It's great to work with!
Tuesday, October 2, 2012
FALL FLOWERS by Nina
It may be fall, but flowers are always one of my favorite designs. So I used an autumn color palette for these cookies.
Colored sugar in the centers.
Sprinkles in the centers.
I love experimenting with design and color variations.
You can see more about this project over at Nina's Show & Tell.
-Nina
Subscribe to:
Posts (Atom)


